For years, men’s haircutting was treated as an afterthought in many salons. A quick trim, a number on the clippers, and out the door. But those days are over. The modern men’s grooming market is booming, and clients are demanding the same level of precision, artistry, and attention to detail that they see in women’s services.
Men’s haircutting is not “easier” than women’s haircutting—it’s different. It requires mastery of tools that many stylists barely touched in cosmetology school: clippers, trimmers, and the often-intimidating scissor over comb technique. It demands an understanding of head shape, hair direction, and the unique challenges of working with shorter lengths where every imperfection is visible.
Whether you’re looking to expand your service menu, attract a new client demographic, or simply become more confident behind the clippers, this guide will walk you through the fundamentals of men’s haircutting—from tool selection to advanced techniques.
The Men’s Grooming Opportunity
Before we dive into techniques, let’s look at why investing in men’s haircutting skills is good business.
Factor Why It Matters
Growing market The men’s grooming industry is projected to reach over $100 billion globally. Men are investing more in their appearance than ever before.
Repeat business Men typically get haircuts every 3–6 weeks—more frequently than many women’s clients.
Higher average ticket Men are increasingly adding services: beard trims, hot towel shaves, scalp treatments, and premium products.
Loyalty Men are notoriously loyal to stylists who understand their hair and deliver consistent results.
Referrals Men refer their friends, partners, and colleagues. One happy male client can bring in an entire network.
Part 1: Know Your Tools
Men’s haircutting requires a different set of tools than women’s haircutting. Understanding each tool—and when to use it—is the foundation of great work.
Clippers
Clippers are the workhorse of men’s haircutting. They use adjustable blades to cut hair at various lengths.
Component What It Does
Blade The cutting mechanism; can be fixed or adjustable
Lever Adjusts the blade to change cutting length (closed = shortest; open = longest)
Motor Rotary (quieter, more power) or magnetic (faster, louder)
Popular clipper brands: Wahl, Andis, Oster, Babyliss
Key skill: Mastering the lever. The lever allows you to blend seamlessly between guard lengths. A clipper with the lever closed cuts shorter than with the lever open—even with the same guard attached.
Clipper Guards (Attachment Combs)
Guards attach to clippers to control cutting length. They’re numbered, but numbers vary by brand.
Guard Number Approximate Length Use
#0 (no guard) 0.5–1mm Bald fades, close tapering
#1 3mm (⅛ inch) Short fades, close sides
#2 6mm (¼ inch) Standard short sides
#3 10mm (⅜ inch) Medium length, blending
#4 13mm (½ inch) Longer sides, top blending
#5–8 16–25mm Longer lengths, top work
Pro tip: Different brands have slightly different lengths. Know your tools. Practice on a mannequin to understand exactly how each guard cuts.
Trimmers
Trimmers are smaller, more precise tools used for detailing, outlining, and close work.
Uses:
Creating sharp hairlines (neck, sideburns, around ears)
Outlining beards and mustaches
Cleaning up edges after clipper work
Dry shaving for a clean finish
Popular trimmer brands: Andis T-Outliner, Wahl Detailer, Babyliss GoldFX
Shears (Scissors)
Shears are essential for top work, longer styles, and scissor over comb techniques.
Recommended for men’s work:
Length: 5–6 inches (shorter than standard shears for better control)
Style: Straight or slightly offset handles
Texture: Thinning shears for blending and weight removal
Combs
Comb Type Use
Clipper comb Sturdy, fine-tooth; used for scissor over comb and clipper over comb
Barber comb Narrow, fine-tooth; ideal for precision work and detailing
Wide-tooth Detangling longer hair before cutting
Part 2: Foundational Techniques
Master these foundational techniques, and you’ll be able to execute almost any men’s haircut.
Technique 1: Clipper Over Comb
Clipper over comb is the foundation of classic men’s haircutting. It’s used to create uniform length, blend between sections, and build shape.
When to use:
Creating even length on the sides and back
Blending between guard lengths
Working on longer lengths where guards don’t reach
How to do it:
Hold the comb in your non-dominant hand, teeth facing outward
Insert the comb into the hair at the desired angle and length
Hold the clippers in your dominant hand
Run the clippers along the back of the comb, following the comb’s shape
Work in sections, moving upward systematically
Key principles:
Comb angle determines length. Comb held parallel to the head creates even length. Comb angled away creates graduation.
Consistent tension. The comb should be steady. Movement creates inconsistency.
Follow the head shape. Your comb should follow the curvature of the skull.
Common mistakes:
Comb too loose = uneven length
Comb too tight = digging into the scalp
Clippers angled incorrectly = gouges or uneven lines
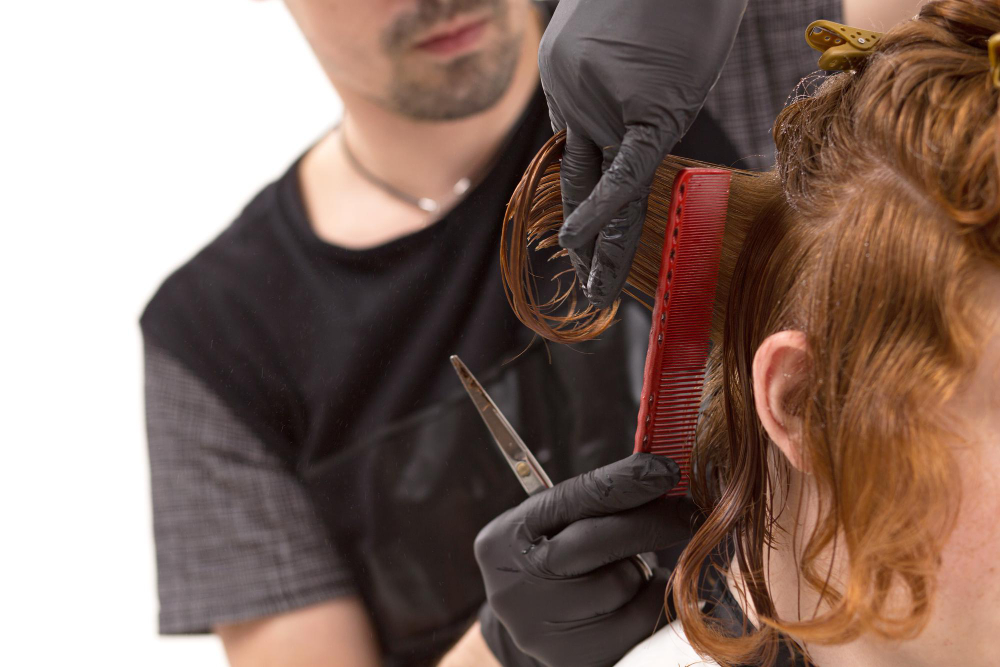
Technique 2: Scissor Over Comb
Scissor over comb is the precision alternative to clipper over comb. It offers more control, especially on longer lengths and delicate areas like the crown and around the ears.
When to use:
Blending from clipper work to longer top lengths
Working on clients with sensitive scalps (scissors are quieter)
Creating soft, textured finishes
Refining shape after clipper work
How to do it:
Hold the comb in your non-dominant hand, teeth facing outward
Insert the comb into the hair at the desired angle
Hold shears in your dominant hand
Cut along the back of the comb, using the comb as your guide
Work in small, systematic sections
Key principles:
Small sections. Work in sections no wider than the comb.
Consistent comb elevation. Keep the comb at the same angle throughout.
Shear position. Keep shears parallel to the comb for even cutting.
Pro tip: Scissor over comb is slower than clipper over comb, but it offers unmatched precision. Use it for finishing and refining rather than bulk removal.
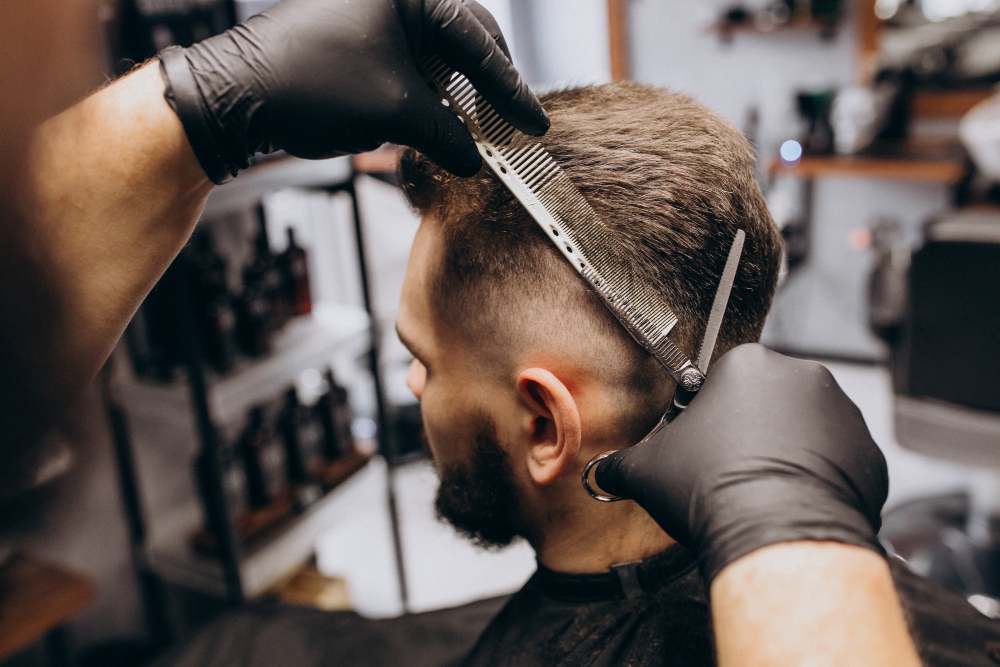
Technique 3: Fading
Fading is the art of seamlessly blending from short to long—typically from the bottom of the sides and back to the top. A great fade is smooth, with no visible lines or “steps.”
The Fading Process:
Step 1: Establish your baseline
Use a #1 or #2 guard to create the shortest length at the bottom
Work from the nape upward, stopping at your desired fade line
Step 2: Create your first blend
Switch to the next guard length (e.g., from #1 to #2)
Start slightly above the previous line, blending upward
Use the clipper lever to create transition
Step 3: Build your fade
Continue moving upward with progressively longer guards
Use the lever to fine-tune blends between guard lengths
Work in small sections, checking constantly
Step 4: Detail and refine
Use trimmers to clean the hairline
Use clipper over comb to blend any remaining lines
Check from all angles
Fade Types:
Fade Type Description
Low fade Fade starts just above the ears; most conservative
Mid fade Fade starts at the temples; versatile, modern
High fade Fade starts high on the sides; bold, edgy
Skin fade Fades completely to the skin at the bottom; cleanest finish
Bald fade Same as skin fade; uses trimmers to go to the skin
Taper Gradual shortening without a defined fade line; classic
Technique 4: Outlining and Detailing
The outline separates a good haircut from a great one. Clean lines around the ears, neck, and sideburns elevate the entire look.
Around the ears:
Use trimmers to clean the hairline
Follow the natural curve of the ear
Use shears for precision if needed
Neckline:
Decide on the shape: natural, squared, or rounded
Use trimmers to create a clean, symmetrical line
Check that the line is even from both sides
Sideburns:
Determine length based on the client’s preference and face shape
Use trimmers to create a clean, straight line
Ensure both sides match exactly
Part 3: Understanding Head Shape and Hair Direction
Men’s haircutting requires a deep understanding of head shape and natural growth patterns. Every head is different, and your technique must adapt.
Common Head Shape Considerations
Head Shape Considerations
Flat occipital May need more weight removal to create shape
Prominent occipital Blend carefully to avoid creating a “shelf”
Cowlicks Work with them, not against; may need to leave slightly longer
Asymmetrical Check both sides constantly; may need to adjust length
Narrow crown Build volume carefully to balance proportions
Growth Patterns to Watch
Pattern How to Handle
Whorls Leave slightly longer; cut in the direction of growth
Recession Blend carefully; don’t create harsh lines that emphasize thinning
Double crowns Work from the crown outward; blend carefully
Calf lick (nape) Use clipper over comb to blend; may need to leave slightly longer
Part 4: The Consultation
A thorough consultation is essential for men’s haircutting. Men often struggle to articulate what they want, and they may not know the terminology.
Questions to Ask
Question What It Reveals
“How do you usually wear your hair?” Styling habits; whether they use product
“How much time do you spend on your hair daily?” Determines complexity of style
“What do you like about your current cut?” What to preserve
“What would you change if you could?” What they’re unhappy with
“How often do you get haircuts?” Maintenance expectations
“Do you want to keep length on top?” Determines shape and blending approach
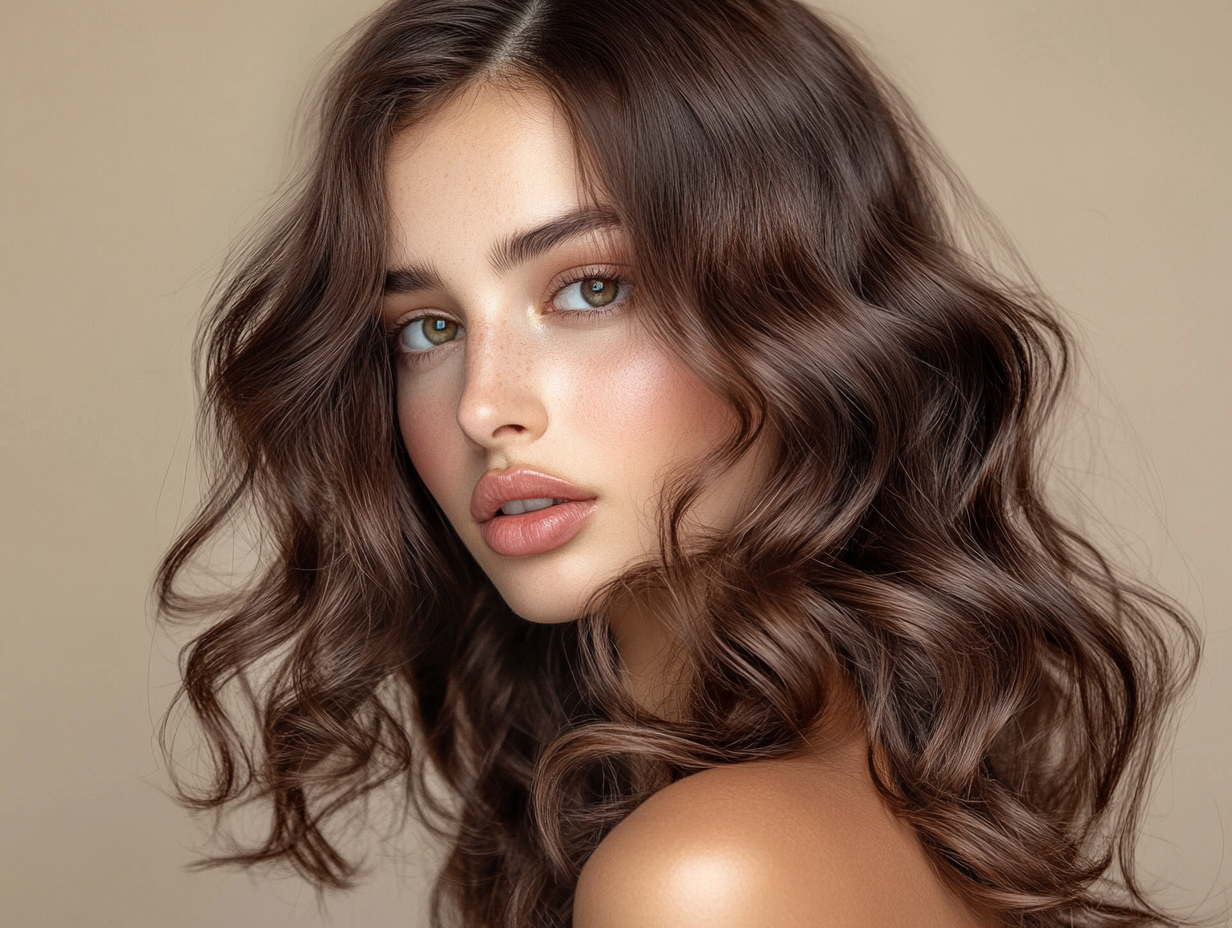
Using Visual References
Men often struggle to describe what they want. Encourage them to bring photos.
What to look for in reference photos:
Fade type (low, mid, high)
Length on top
Neckline shape
Texture (sleek, textured, messy)
Setting expectations:
Hair texture affects how a style looks
Face shape influences what styles work best
Some reference photos may not be realistic for their hair type
Part 5: Step-by-Step Men’s Haircut
Let’s walk through a classic men’s haircut: a mid fade with length on top.
Step 1: Section and Prepare
Part the hair where the client naturally parts
Section off the top, clipping it out of the way
Ensure hair is clean and damp (unless cutting dry for texture)
Step 2: Establish the Fade Baseline
Use a #1 guard, lever closed, to create your shortest length at the bottom
Work from the nape upward to just below the desired fade line
Keep the line consistent around the head
Step 3: Build the Fade
Switch to a #2 guard, lever closed
Start just below the previous line, blending upward
Use the lever to create transitions: closed for shorter, open for longer
Work in small sections, checking constantly
Switch to a #3 guard (or use #2 with lever open)
Continue blending upward to the parietal ridge
Use clipper over comb to blend into the top length
Step 4: Cut the Top
Remove the top section clips
Determine desired length (use fingers or a comb as a guide)
Cut with shears, following the natural fall or using elevation for volume
Consider texture: point cutting for a softer finish; blunt cutting for a heavier look
Step 5: Blend Top to Sides
Use scissor over comb to blend the top into the sides
Work around the head, connecting the two sections
Check from all angles for smooth transition
Step 6: Detail and Outline
Use trimmers to clean the neckline, around the ears, and sideburns
Check for symmetry—use a mirror to see angles you can’t see directly
Use clipper over comb to refine any remaining lines
Step 7: Finish and Style
Dry the hair completely
Apply product based on desired finish (pomade for shine and hold; clay for texture; wax for definition)
Style with fingers, comb, or brush
Do a final check from all angles
Part 6: Beard Trimming and Shaping
Beard services are a significant revenue opportunity. Many men want their beard shaped to complement their haircut.
The Beard Consultation
Ask about their current beard routine
Discuss desired shape and length
Look for uneven growth patterns
Beard Shaping Steps
Define the neckline: Two finger-widths above the Adam’s apple; clean, symmetrical line
Define the cheek line: Follow natural growth; clean up stray hairs
Shape the mustache: Trim above the lip; define the edges
Create length and shape: Use clippers with guards to create even length
Detail: Use trimmers for precision; use shears for longer beards
Finish: Hot towel, beard oil, and balm
Part 7: Common Mistakes and How to Fix Them
Mistake Why It Happens How to Prevent How to Fix
Visible fade lines Inconsistent blending; not using the lever Use lever to create transitions; blend in small sections Use clipper over comb with lever open to soften the line
Uneven neckline Rushing; not checking symmetry Use a mirror to check from all angles; take your time Reposition client; even out carefully
Gouges or divots Clipper angle too steep; comb too tight Keep clippers parallel to the comb; steady pressure Blend around the gouge; may need to shorten surrounding area
Uneven sideburns Not measuring; not checking symmetry Measure against the ear or eye; check both sides Even the longer side down to match the shorter
Bulk at the crown Not accounting for growth direction Work with the whorl; leave slightly longer if needed Use scissor over comb to remove bulk gradually
Top too short Not checking length before cutting Cut longer than you think; you can always take more Embrace it; educate client on growth time
Quick Reference: Tool and Guard Guide
Desired Length Tool Setting
Bald/skin Trimmers or clipper with no guard Lever closed
0.5–1mm Clippers No guard, lever open
3mm (⅛”) Clippers #1 guard, lever closed
6mm (¼”) Clippers #2 guard, lever closed
10mm (⅜”) Clippers #3 guard, lever closed
13mm (½”) Clippers #4 guard, lever closed
Blending Clippers Adjust lever between guards
Top length Shears Scissor over comb or finger cutting
Detailing Trimmers N/A
Final Thoughts
Men’s haircutting is a craft within a craft. It demands precision, patience, and a deep understanding of tools, techniques, and head shape. But for stylists who invest in mastering it, the rewards are significant: loyal clients, consistent repeat business, and a reputation that sets you apart.
The modern male client is no longer satisfied with a quick trim and a number. He wants a stylist who listens, who understands his hair, and who can deliver a look that makes him feel confident. He’s willing to pay for that expertise—and he’ll follow the stylist who provides it.
Whether you’re picking up clippers for the first time or refining advanced fading techniques, remember: every great men’s haircut starts with the fundamentals. Master the basics. Practice consistently. And never stop learning.