Posted on Leave a comment

Jawline Bobs, Feathered Pixies & Mini-Bobs: How to Adjust Classic Cuts for a 2025 Audience

Classic cuts never disappear—they evolve. In 2025, some of the most iconic shapes are re-emerging with modern adjustments that reflect today’s preferences: softness, movement, individuality and low-maintenance structure. Jawline bobs, feathered pixies and mini-bobs are trending not because they’re new, but because stylists are reimagining them with updated geometry and texture.

Here’s how to adapt these timeless cuts for a contemporary salon audience.


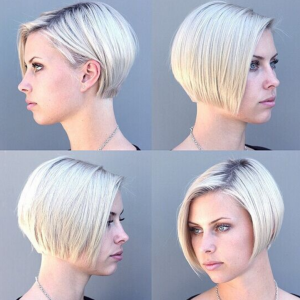
Jawline Bobs: Clean Lines With Modern Softness

The jawline bob is back, but the 2025 version isn’t as severe or rigid as past iterations. Today’s clients want polish without stiffness, and stylists are reshaping this cut to feel more versatile.

2025 Updates to the Jawline Bob

  • Slight beveling to soften the perimeter and prevent a harsh, square look

  • Less internal graduation, keeping the weight low for a sleek silhouette

  • Micro-texturizing at the ends to enhance natural movement

  • Optional micro-fringe or mini face frame for added personality

  • Subtle asymmetry for a modern, editorial edge

The goal is a bob that holds structure but still moves, adapts and flatters without feeling overly “done.”


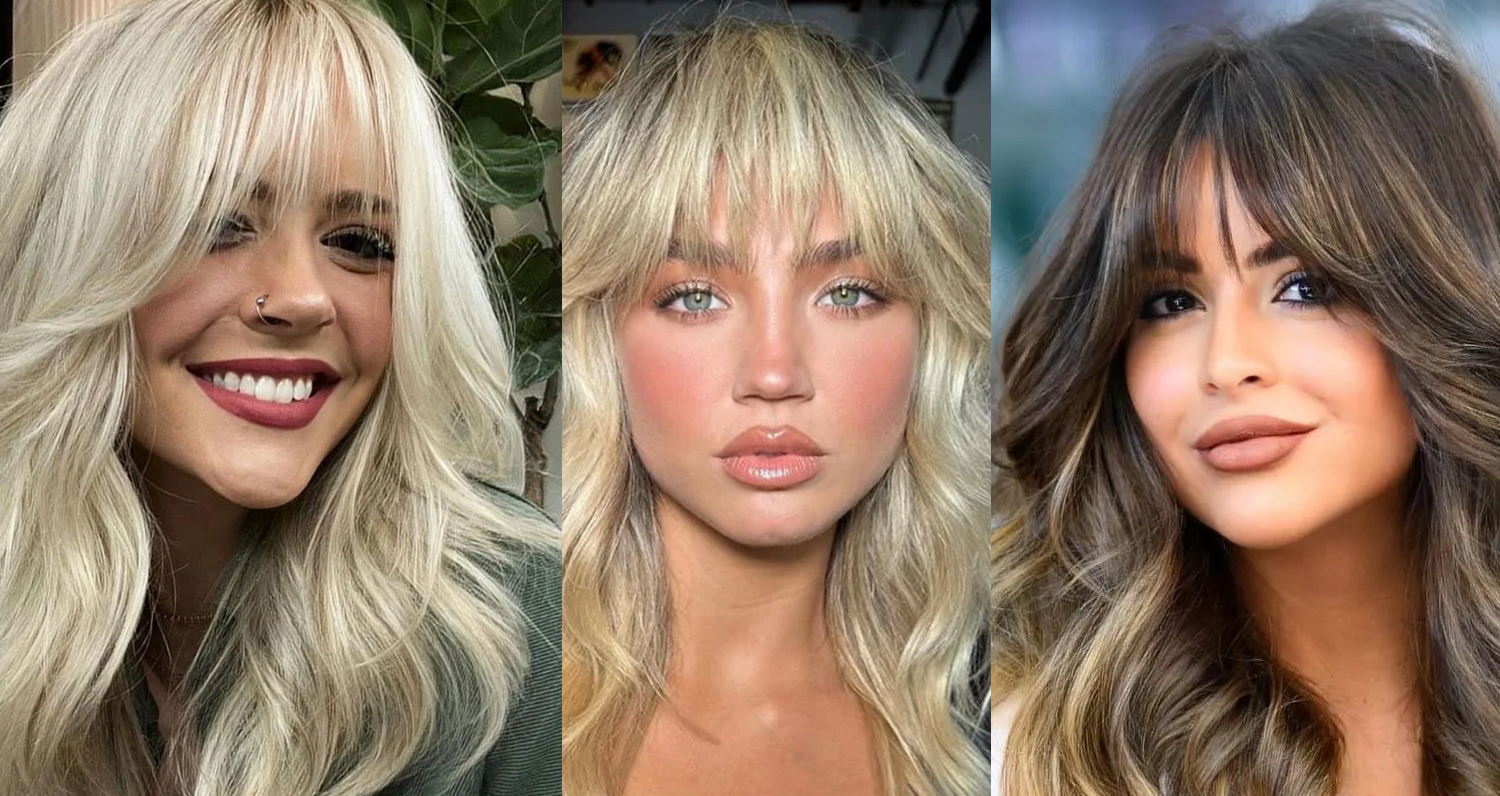
Feathered Pixies: Airy, Lived-In Texture

Pixies have shifted from ultra-short and sharp to featherlight and expressive. The feathered pixie is one of the biggest short-hair trends of 2025 because it offers softness, fluidity and versatility across all textures.

Key Adjustments Making Pixies Feel Fresh

  • Larger, sweeping top sections for movement

  • Feathering through the crown to prevent volume collapses

  • Diffused perimeters instead of razor-sharp outlines

  • Extended sideburn areas for a cool, modern contour

  • Piecey fringe moments that frame rather than stiffen the look

This version suits a wide range of faces because it combines structure with freedom—controlled yet effortless.


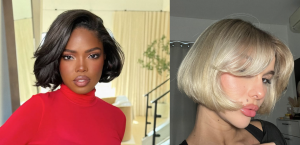
Mini-Bobs: Precision Meets Playful Minimalism

A mini-bob sits above the jaw and below the cheekbone, making it a stylish midpoint between a bob and a pixie. The 2025 mini-bob prioritizes simplicity paired with intentional geometric choices.

What Sets the Modern Mini-Bob Apart

  • Shorter perimeter that still feels soft due to micro-layering

  • Minimal graduation to maintain a strong outline

  • Light internal debulking so the shape doesn’t balloon

  • A clean, sculpted nape for a polished finish

  • Optional cheekbone-length pieces for contour and softness

Mini-bobs are trending because they feel bold without requiring harsh lines.


Techniques That Modernize All Three Cuts

What unites these updated classics is a shared set of contemporary techniques that stylists are using to elevate them:

1. Directional Cutting With Purpose

Cuts now rely heavily on strategic line direction to balance softness and structure. Horizontal lines add strength; vertical lines add movement.

2. Invisible Internal Layering

Internal debulking prevents puffiness while keeping edges sleek—especially essential for mini-bobs and jawline bobs.

3. Custom Fringe Architecture

Fringes in 2025 are purposeful shapes: micro, curtain, crescent or diffused. Each classic cut gains a modern twist through fringe design.

4. Soft Perimeters Instead of Harsh Outlines

Ends are refined with point-cutting or controlled texturizing to avoid that “helmet” effect.

5. Movement Mapping

Stylists are analyzing natural fall patterns to adjust each cut so it looks intentional with minimal styling.


Why These Updated Classics Are in Demand

Today’s clients want:

  • Low-maintenance silhouettes

  • Editorial-inspired shapes that still work in real life

  • Cuts that flatter natural texture, not fight it

  • Soft structure rather than stiff geometry

  • Haircuts that look good even without heat styling

Jawline bobs, feathered pixies and mini-bobs deliver all of this when designed with modern techniques.


A New Era of Classic Shapes

The 2025 audience isn’t abandoning traditional cuts—they’re redefining them. By blending precision with softness, stylists can craft versions of these classics that feel current, wearable and distinctly personalized.

These cuts succeed when they’re built on expertise, strategic shaping and an understanding of how today’s clients want their hair to grow, move and express their style.

Posted on Leave a comment

The Power of Vertical vs. Horizontal Cutting: When Each Direction Changes Everything

Cutting direction is one of the most influential yet underestimated elements in haircut design. Two lines—vertical and horizontal—can completely alter the shape, weight distribution, and personality of a cut. For stylists, mastering these directions opens the door to intentional, sculpted results instead of relying on guesswork or habit.
Why Matters
Every cut is built on geometry. The direction of your line determines whether the finished shape feels strong and structured or soft and fluid. Understanding the “why” behind vertical and horizontal cuts gives stylists full command over the final visual impact.
Horizontal Cutting: Strength, Weight, and Structure: Horizontal lines create a sense of stability and fullness. They build a shape that feels grounded and substantial.
What horizontal lines do:
  • Add weight and density
  • Strengthen the outline
  • Emphasize width or a fuller silhouette
  • Keep the eye focused on the horizontal perimeter
Where horizontal cutting shines:
  • Blunt bobs
  • Heavier one-length cuts
  • Solid perimeters
  • Shapes that need strong presence and visual weight
Horizontal cutting is ideal when the goal is structure, precision, and a pronounced outline.
Vertical Cutting: Softness, Movement, and Fluidity
Vertical lines break up weight and encourage lightness and flow. They elongate the silhouette and create softness without sacrificing control.
What vertical lines do:
  • Remove weight without collapsing shape
  • Create movement and internal layering
  • Add subtle texture
  • Keep the eye traveling up and down the shape
Where vertical cutting excels:
  • Layered shapes
  • Long seamless blends
  • Lived-in movement
  • Cuts designed to fall naturally with minimal styling
Vertical cutting is the foundation for airy, modern, and low-maintenance shapes that feel effortless but technically refined.
How Direction Shapes the Final Silhouette
Switching from horizontal to vertical—even for one section—can transform the outcome.
Examples:
  • A blunt bob becomes soft and lived-in when vertical pieces are introduced through the interior.
  • A layered cut becomes fuller and stronger when the perimeter is reinforced with horizontal lines.
  • A long shape gains movement when vertical lines release weight from the mids and ends.
The magic lies in knowing when to combine both directions for balance.
Combining Both: Hybrid Techniques for Modern Cuts
Most contemporary haircuts live in the intersection of horizontal and vertical lines. Stylists often blend both to design shapes with structure and movement.
Hybrid strategies may include:
  • Horizontal perimeter + vertical internal layers
  • Vertical face-frame + horizontal crown sections for lift
  • Horizontal graduation blended into vertical texturizing
This approach gives the cut clarity, softness, and longevity all at once.
The Stylist’s Advantage
When stylists understand cutting direction deeply, every decision becomes intentional. Vertical and horizontal lines stop being “techniques” and become design tools—guiding shape, silhouette, and movement with precision.
Mastering these directional choices allows stylists to create haircuts that are technically strong, visually refined, and truly custom to the individual sitting in the chair.
Posted on Leave a comment

Cutting for Head Tilt and Posture: Why the Way a Client Holds Themselves Matters More Than Face Shape

For decades, haircut design has been taught around face shape charts. And while bone structure matters, the way a client naturally holds their head matters more. Posture and habitual head tilt determine where weight sits, how length reads, and how symmetry appears in real life—not just in the chair.

A technically perfect cut can still look uneven if it wasn’t designed for the client’s lived posture.

1. Face Shape Is Static. Posture Is Real.

Face shape assumes the head is upright and balanced.
But most clients don’t hold themselves that way.

Common posture patterns:

  • Slight forward head tilt (very common with desk and phone use)

  • One shoulder higher than the other

  • Chin slightly forward or down

  • Habitual side tilt when talking or driving

These shifts change:

  • Where the perimeter appears to sit

  • Where fullness gathers

  • How weight distributes visually

This is why a straight line on the mannequin becomes uneven in the real world.

2. The Client’s Neutral Posture Is the Blueprint

Instead of positioning the client for your cutting ease, position them in their natural resting stance.

How to find it:

  1. Ask the client to sit normally—no posture correction.

  2. Start conversation while observing head carriage.

  3. Watch how they move their head when explaining what they want.

This is the posture the haircut must suit—not the one they briefly hold when posed.

3. Cutting for Tilt

If the client habitually tilts to one side:

  • Weight will visually concentrate on the lower side.

  • The higher side will appear more exposed and longer.

Adjustment strategy:
Cut the lower-tilting side slightly heavier or with less elevation.
Cut the higher-tilting side with slightly more softness or internal release.

Goal: Visual symmetry, not literal symmetry.

4. Cutting for Forward Head Posture

Clients with forward head posture often feel:

  • Collapsing crown volume

  • A heavy, flat back shape

  • A perimeter that appears longer than intended

Adjustment strategy:

  • Build subtle support and lift in the crown.

  • Keep perimeter lines clean but beveled, not aggressively blunt.

  • Maintain internal structure to prevent back-weight collapse.

The shape should read balanced when the head is forward, not only when upright.

5. Cutting for Shoulder Imbalance

One shoulder higher shifts the perimeter visually.

If cut exactly the same on both sides:

  • One side will always appear longer.

Adjustment strategy:
Cut to the visual line, not the measured line.
You are designing the shape the eye will read, not the ruler.

6. The Key Is to Watch Movement Before You Cut

Before you lift a section:

  • Watch how the hair falls when the client turns, nods, lifts, or speaks.

  • This reveals how the shape will behave in daily life.

You’re not cutting a haircut for the mirror.
You’re cutting a haircut for motion.

7. Language to Communicate This to Clients

This reinforces value and elevates your role:

“I’m designing this so your shape stays balanced based on how you naturally hold your head—not just how it looks sitting still.”

Clients hear:

  • Custom.

  • Considered.

  • Expertise-driven.

A haircut that only works when the client holds perfect posture is a haircut that fails in real life. True precision isn’t just about clean lines—it’s about designing for how the client actually moves and carries themselves. When posture becomes part of your cutting logic, your shapes stay balanced, wearable, and visually consistent well beyond the salon.

Posted on Leave a comment

The “No Tool” Finish: How to Design Cuts That Look Professional Even Without Styling

Today’s clients want hair that looks effortlessly good — even when they skip the blow-dryer. The “no-tool” finish has become a modern benchmark for cutting mastery: shapes that fall beautifully without heat, tension, or excessive product. A true professional cut should perform on its own, revealing balance, movement, and design integrity from every angle — no iron required.


1. Why the “No-Tool” Finish Defines Modern Skill

  • Low-maintenance demand: Clients expect shapes that air-dry into place.

  • Health-first approach: Less heat means stronger hair and better color retention.

  • Technical integrity: A haircut that relies on blow-drying for shape is a styling illusion, not a design.

The “no-tool” finish proves the stylist’s ability to sculpt form directly into the cut — not just style it into existence.


2. Designing Shape That Works Without Heat

The difference between a cut that collapses and one that self-styles lies in how the internal structure interacts with gravity and texture.

  • Work with the fall: Map out where the hair naturally separates and drops.

  • Control bulk, don’t erase it: Internal weight removal creates swing, but over-texturizing kills structure.

  • Use head shape as your guide: Build volume where the head flattens and remove weight where it expands.

  • Account for texture behavior: Predict how hair shrinks, lifts, or expands once dry.

“If the cut only works under tension, it’s not truly designed — it’s styled.”


3. Technical Focus: Cutting by Hair Type

Straight Hair

  • Rely on beveling and precise graduation for shape.

  • Avoid heavy slicing — it makes hair appear limp once dry.

  • Keep internal density balanced so the perimeter feels intentional, not blunt.

Wavy Hair

  • Design movement through elevation, not layering excess.

  • Cut with natural fall; avoid stretching the wave straight.

  • Use slide or channel cutting to release gentle motion through mids.

Curly or Coily Hair

  • Cut in the natural state to respect true pattern and shrinkage.

  • Build the perimeter first, then sculpt the interior visually.

  • Avoid removing too much bulk at the crown — it breaks silhouette integrity.


4. The Air-Dry Equation

A great “no-tool” finish is part design, part prep. During the service:

  • Finish the cut with a light mist and let the hair settle — observe the real fall before refining.

  • Use minimal product — the goal is natural control, not forced shape.

  • When finishing, let the hair dry as the client would at home.

This ensures your result doesn’t depend on a polished blowout to look balanced.


5. Coaching Clients for Success

Teach clients to guide, not fight, their natural finish:

  • Recommend hands-off drying until hair is 70–80% dry.

  • Suggest microfiber towels or cotton tees to reduce frizz.

  • Offer one product prescription: a single cream, foam, or leave-in that supports the shape.

  • Demonstrate a one-minute refresh routine for second-day wear.

“This cut was designed to do the work. You’re just reminding it where to go.”


6. The Professional Payoff

Stylists who master the no-tool finish stand out because their work speaks for itself:

  • Cuts look intentional, not accidental.

  • Clients see value in shape that lasts longer and styles itself.

  • It builds loyalty — clients return not because their hair stops working, but because they want to keep it performing.

A “no-tool” finish isn’t about skipping styling — it’s about proving control. When you design a cut that air-dries beautifully, you show the strength of your technique, not the strength of your dryer. These shapes respect natural behavior, simplify the client’s routine, and showcase what great cutting truly is: architecture, not illusion.

Posted on Leave a comment

Wispy Layers & “Hush Cut” Revival: How Soft Textures Are Replacing Heavily Layered Styles

Chunky layers and dramatic step-downs are fading into the background. In 2025, softly diffused layers and the hush cut are taking over—giving stylists more freedom to design movement that looks effortless, healthy, and naturally air-dried. The trend reflects what clients want most right now: shapes that feel lighter, grow out beautifully, and don’t demand hot tools every morning.

What Defines a Hush Cut

The hush cut is all about whisper-soft transitions, not visible weight removal. Think:

  • Soft internal layers hidden under a stronger perimeter

  • Subtle face framing that melts back into the shape

  • Airy movement through mids and ends

  • Lightness without losing fullness

The goal is to remove bulk without showing where weight was taken—creating a balanced, flattering silhouette from every angle.

 Why Heavy Layers Are Being Replaced

Stylists are shifting toward this approach for several reasons:

  • Clients want longer-lasting shapes that don’t collapse after a month

  • Soft layers help preserve density, especially on finer hair

  • Less styling dependency—texture falls where you design it

  • The shape grows out gentler, meaning fewer panicked mid-phase trims

  • Softness aligns with current low-effort, high-polish finishes

It’s a modern refinement: dimension without disruption.

3. How to Cut Wispy Layers with Intention

Design Principles:

  • Start with density mapping — the heavier the section, the softer the internal lift

  • Use controlled over-direction where movement is desired

  • Micro-texturize mids and ends only—avoid weakening the crown

  • Support the perimeter — don’t hollow out the bottom if fullness is the goal

Tool Options:

  • Slide cutting for diffused texture

  • Point cutting for softness inside the line

  • Razor only when hair type supports it (avoid on compromised strands)

This is precision disguised as simplicity.

Face Framing: The Signature of 2025 Soft Shapes

Placement makes the biggest difference here. Key guides:

Face FeatureBest Design Approach
Strong cheekbonesPlace short point at the cheek to enhance the lift
Wide jawlineKeep framing longer to avoid accentuating width
Long face shapeUse curved framing to soften downward lines

Remember: millimeters matter.

How to Finish for Modern Soft Movement

  • Encourage air-dry or low-heat styling

  • Choose lightweight products: mousse, whipped creams, soft texturizers

  • Avoid heavy oils or hard holds that collapse the airy effect

  • Create root lift + loose ends rather than polished curls

“The undone look is now intentional, not neglected.”

Client Education That Builds Trust

Set clear expectations for styling and longevity:

“These layers are designed to support your natural movement. They’ll hold their shape even on the days you skip a full blowout.”

Reinforce:

  • Why over-texturizing can weaken the cut

  • How soft structure protects fullness over time

  • What to ask for at maintenance visits (not shorter — cleaner)

The hush cut and wispy layering aren’t trends built on shock value—they’re built on craftsmanship. By shifting from dramatic debulking to precision softness, stylists can deliver shapes that are lived-in, touchable, and consistently flattering.

Soft textures require skill, but when executed well, they give clients exactly what they’ve been asking for:

✔ movement without effort
✔ shape that lasts
✔ hair that feels better as it grows

For 2025, loud layers are out — whisper-cuts are in.

Posted on Leave a comment

Ultra Short Bobs & Jaw-Length Cuts: Short Shapes That Make a Big Statement in 2025

Short haircuts are having a moment in 2025—and not just any short haircut. The jaw-length bob and ultra-short bob variations are rising in popularity for their bold impact, versatility, and ability to reflect personal style while staying clean and polished. According to recent industry coverage, these shapes are among the most requested for 2025.

Here’s how stylists can make these cuts work for clients, how to tailor them by texture and face shape, and how to position them in your service offerings.

1. Why Jaw-Length & Ultra Short Cuts Are Trending

  • A statement with minimal length: A cut that stops at the jaw or chin immediately draws attention to facial structure, neckline, and bone shape—making it a bold but wearable shift.

  • Efficient styling: Shorter lengths can translate into faster service, easier styling routines, and lower maintenance for the client. Glamour notes that “a bob … is a classic for a reason” in 2025.

  • Modern updates to classics: While long bobs and lobs still dominate, the sharper, more defined ultra-short options reflect a move toward precision and chic simplicity rather than layered long hair.

2. Key Design Considerations for Stylists

When cutting a short shape of this nature, technical precision is non-negotiable. Here are the factors to address:

  • Length endpoint: The jawline isn’t just arbitrary—it frames the face and can enhance features. A cut that hugs the jaw will emphasize cheekbones and create a more structured silhouette.

  • Perimeter control: Short bobs sit without much “length buffer,” so the perimeter must be intentional. Whether it’s blunt, beveled, or slightly graduated will affect how it grows out and frames the face.

  • Internal structure: Even in short shapes, internal weight must be managed—especially in thicker hair. Micro-undercuts or precise internal layering are tools to reduce bulk while maintaining strong external line.

  • Texture awareness: For waves or curls, allowance for expansion is critical. A short bob may look dramatically different once dry—understanding texture behavior is key.

  • Face-shape mapping:

    • For round faces: Slightly longer in front or soft layering can elongate.

    • For square faces: A jaw-length bob with soft edges or bevel can soften angles.

    • For oval: Most lengths work, so your design can lean into accenting features.

  • Finish strategy: The cut must look intentional both styled and natural. Decide if the finish will be sleek (flat iron + gloss) or airy (diffused waves + light styling). The cut must support the finish you intend.

3. Service & Consultation Strategy

  • **Position it as an investment—**not a shortcut. Many clients fear “short” means “less work”—clarify that while styling may simplify, the cut requires precision and maintenance awareness.

  • Talk grow-out early. A jaw-length bob will show changes quickly. Frame it: “We’ll design the length now with your lifestyle in mind. When it grows, we’ll maintain the shape by…”

  • Texture test in the chair. Especially on curly/wavy hair: show the client how the shape will sit dry versus wet. Nail expectations before proceeding.

  • Maintenance schedule. Short shapes often need more frequent trims (6-8 weeks) to keep the line sharp. Factor this into your pricing and client commitment.

4. Who This Works For—and Who It Doesn’t

Ideal Clients:

  • Those wanting a bold change and comfortable with higher styling visibility.

  • Clients with defined features (jawline, cheekbones) who will benefit from a shorter silhouette.

  • Clients ready for commitment to styling or comfortable with simpler routine.

Not Ideal:

  • Clients who prefer very low-maintenance daily styling and dislike daily shaping.

  • Those with extreme shrinkage curls where the shape would pull up too much.

  • Clients transitioning out of very long lengths who might benefit from a lob first.

Jaw-length and ultra short bobs aren’t just haircut trends—they’re design statements with discipline. The shorter the shape, the less room for error, and the more visible the precision. When executed with intention—considering face shape, texture, internal structure, and maintenance—they communicate confidence, craftsmanship, and modern elegance.

Posted on Leave a comment

Three-Tiered Layering: Building Internal Depth That Shows From Every Angle

Layering isn’t just about removing weight—it’s about designing how that weight moves. The most dimensional, balanced shapes are often built on a three-tiered layering system that controls how light, motion, and structure interact from crown to perimeter. When done intentionally, it creates hair that looks sculpted in motion and balanced in stillness—no matter which angle the client turns.

1. Why Three Tiers Matter

Traditional layering often focuses on either surface or interior work, but hair moves in planes, not panels. The three-tier approach builds shape through three internal zones:

  1. Top layer (visual movement): Controls reflection, bounce, and visible motion.

  2. Middle layer (support system): Acts as the stabilizer—where the true architecture of the haircut lives.

  3. Bottom layer (foundation): Defines perimeter integrity and determines how the cut sits against the body or shoulders.

Ignoring any one of these layers leads to imbalance—flat crowns, heavy mids, or collapsing ends.

2. Tier One: The Movement Layer

  • Elevation: High (90° and above) to remove excess weight.

  • Purpose: Creates lightness and motion through the crown and surface.

  • Key caution: Don’t over-elevate fine or fragile hair—surface layers should move, not fly away.

This tier defines how the haircut comes to life when styled.

3. Tier Two: The Support Layer

  • Elevation: Medium (45°–90°), depending on density and head shape.

  • Purpose: Balances transitions between top and bottom layers, keeping movement structured.

  • Technique: Use diagonal or radial sections to direct weight where the head flattens—often at the crown or behind the ear.

This is where precision meets art. Tier two carries the cut’s architecture, ensuring that movement doesn’t become chaos.

4. Tier Three: The Foundation Layer

  • Elevation: Low (0°–45°).

  • Purpose: Maintains the haircut’s perimeter, weight line, and silhouette.

  • Key focus: Decide whether this layer will anchor (solid perimeter) or float (soft perimeter).

Without a strong foundation, even perfect surface layering loses definition.

5. How to Make the Layers Work Together

GoalEmphasisTechnical Strategy
Fullness + softnessMiddle + top tiersBlend vertically, preserve density through the perimeter
Movement + expansionTop + middle tiersUse diagonals and texturizing for flow
Sleek structureFoundation + supportKeep perimeter tight, limit surface disruption

The art lies in connection points—ensuring each tier transitions seamlessly without visible ledges.

6. The Client Experience

Clients may not understand “three tiers,” but they instantly feel the difference. A properly tiered cut falls into place naturally, air-dries evenly, and looks balanced from every angle.

“I’ve designed this in layers that move together, so your hair keeps its shape whether you wear it straight, wavy, or curled.”

This phrasing highlights your design intent without getting overly technical.

Three-tiered layering turns cutting into sculpture. Each tier serves a purpose—movement, structure, and stability. When those layers are balanced, hair looks alive and fluid from every viewpoint. It’s not about how much you remove—it’s about how intelligently you connect what remains.

Posted on Leave a comment

Cutting for Motion: Using Diagonals, Radials, and Over-Direction to Direct Fall

Every haircut has movement—even when it’s not moving. How hair falls, swings, and responds to gravity depends on how it was sectioned and cut. Understanding motion design means shaping the way hair behaves after the client leaves the chair, not just how it looks in the mirror at the salon.

1. The Role of Motion in Hair Design

Motion isn’t random—it’s engineered. A well-cut shape guides the eye and the weight distribution so the style moves naturally, whether it’s a sharp bob or flowing layers.

  • Motion defines how light reflects through the shape.

  • Motion reveals the internal structure of the cut.

  • Motion determines how the style settles when air-dried or heat-styled.

To create intentional motion, you must think in planes and directions, not just lengths.

2. Diagonals: The Directional Blueprint

Diagonal sections are the foundation of movement.

  • Forward diagonals create progression and softness—ideal for face-framing or internal layering that draws attention toward the front.

  • Backward diagonals build weight and volume toward the crown or perimeter, enhancing structure and body.

Pro tip: Slightly altering the angle of a diagonal (even by 5–10 degrees) changes how the hair swings when it drops. Forward motion softens, backward motion strengthens.

3. Radials: Building Roundness and Flow

Radial sections—those that pivot from a central point like spokes on a wheel—control how the haircut expands around the head shape.

  • Short to long from crown to nape: Encourages backward movement and lift.

  • Short to long from crown to face: Encourages forward drape and layering.

Radials are especially powerful in round or layered shapes, giving the cut fluid motion that follows the natural curvature of the head rather than working against it.

4. Over-Direction: The Motion Amplifier

Over-direction is how stylists manipulate where weight lives in the haircut.

  • Over-directing forward: Keeps length and weight in the back—ideal for clients who want volume or a sweeping shape.

  • Over-directing backward: Preserves length toward the face, creating movement and softness in front.

The amount of over-direction determines how exaggerated or subtle that movement becomes. Think of it as tension applied with intention.

5. Combining Techniques for Controlled Flow

The best motion designs blend these principles:

  • Use diagonals to establish direction.

  • Use radials to contour to the head shape.

  • Use over-direction to refine balance and weight.

Together, they create cuts that move with purpose—not just layers for the sake of layering.

6. Talking Motion with Clients

Clients don’t understand “over-direction,” but they do understand flow:

“I’m cutting this so it falls forward and frames your face when you move—it won’t just sit still when it dries.”

This language communicates mastery without jargon.

Cutting for motion is cutting for life outside the salon. Diagonals guide direction, radials shape expansion, and over-direction refines balance. When these techniques align, the result is hair that moves the way it was designed to—fluid, natural, and effortless from every angle.

Posted on Leave a comment

Graduation vs. Elevation: The Subtle Distinction That Impacts Every Cut

In cutting theory, two words often get used interchangeably: graduation and elevation. But while they work together, they are not the same. Understanding their subtle differences is critical for predictable outcomes—especially when building shape, controlling weight, or customizing a cut to a client’s head shape and density.

1. Elevation: The Angle of Lift

  • Definition: Elevation is the degree at which the hair is lifted away from the head before it’s cut.

  • Function: Determines how much weight is removed.

  • Example:

    • Zero degrees (cutting hair in natural fall) = maximum weight.

    • Higher elevation (45°, 90°) = progressively lighter, more layered results.

Think of elevation as the “mechanic” that controls weight distribution.

2. Graduation: The Resulting Build-Up of Weight

  • Definition: Graduation is the visible buildup of weight created by cutting hair at a low to medium elevation.

  • Function: Shapes the perimeter to appear stacked, beveled, or rounded.

  • Example:

    • A bob with beveled edges shows graduation.

    • A pixie with stacked layers at the back demonstrates high graduation.

Graduation is not the angle itself—it’s the effect produced by elevation.

3. How They Interact

  • Elevation creates graduation. Lifting the hair at controlled angles produces stacked, overlapping lengths.

  • Graduation defines the shape. Depending on where weight builds up, the silhouette of the cut changes—soft, strong, rounded, or square.

Without understanding this relationship, stylists risk creating unintended bulk or removing too much weight.

4. Practical Applications

  • Blunt Cuts: Minimal elevation, minimal graduation → strong weight lines.

  • Graduated Bobs: Low to medium elevation → intentional buildup of weight at the perimeter.

  • Layered Cuts: Higher elevation → less graduation, more movement and softness.

5. Client Communication

Clients don’t need to hear “graduation” vs. “elevation.” Translate it into benefit language:

“By lifting your hair at this angle, I can keep it light through the back but strong at the outline. That way, your cut looks full but not heavy.”

This makes the technical choice feel intentional and client-focused.

Elevation is the action. Graduation is the result. Recognizing the difference—and knowing how to manipulate one to control the other—gives stylists the precision to design shapes that feel customized, balanced, and intentional on every client.

Posted on Leave a comment

Foil Folding vs. No-Fold: How Placement Impacts Lightener Performance

Every stylist learns how to fold a foil—but fewer are taught when not to. The choice between folding and leaving foils open isn’t just about neatness—it’s about heat, lift, saturation, and control. Understanding how foil placement affects lightener performance helps you customize your approach for each head of hair, rather than relying on habit.

1. The Science of Foils and Heat

  • Foils create insulation. Folding traps heat, which accelerates processing and increases lift.

  • Open foils release heat. Without folding, airflow cools the lightener, slowing the reaction for more controlled results.

Key takeaway: Folding speeds things up, but faster isn’t always better.

2. When to Fold

  • High-lift blonding: For clients seeking maximum brightness in fewer sessions, folding foils can boost the processing power of lightener.

  • Resistant hair types: Coarse, dark levels may need the extra heat to push pigment more effectively.

  • Tight placement needs: Folding keeps sections contained and secure, preventing product from slipping.

3. When Not to Fold

  • Delicate hair: Fine or fragile hair benefits from slower, gentler lift to avoid overprocessing.

  • Precision blending: Leaving foils open helps reduce heat pockets that can create uneven lift or banding.

  • Creative techniques: Balayage-in-foil or face-framing “babylights” often work better with open foils for softer diffusion.

4. The Product Factor

  • Clay lighteners (often used for balayage) perform better in open-air environments; folding can cause them to dry inconsistently.

  • Traditional lighteners benefit from the humidity inside folded foils, staying moist longer and lifting more evenly.

5. Application Technique Matters

  • Tension and saturation should guide your choice. If a section feels heavy with product, folding may risk bleed marks. If product is applied lightly, folding can keep everything secure.

  • Size of section: Thicker sections with lots of hair may not fold cleanly and can result in patchiness if the product shifts inside.

6. Communicating With Clients

Clients may notice you leaving foils open and assume it’s “unfinished.” A simple explanation builds trust:

“I’m leaving these foils open so the lightener processes at a slower, controlled pace. This protects your hair and ensures a softer, more even blend.”

Foil folding isn’t about right or wrong—it’s about intention. Folding accelerates and intensifies, while open foils control and soften. The best stylists know when to switch between the two within the same head of hair to achieve lift, preserve health, and maintain precision.